What Containers Are Freezer Safe Your Ultimate Guide
Tired of freezer disasters? Discover what containers are freezer safe in our ultimate guide. We cover glass, plastic, and silicone to perfect your meal prep.
Love This Article?
Get personalized meal plans with recipes like this, automatically matched to your nutrition targets.
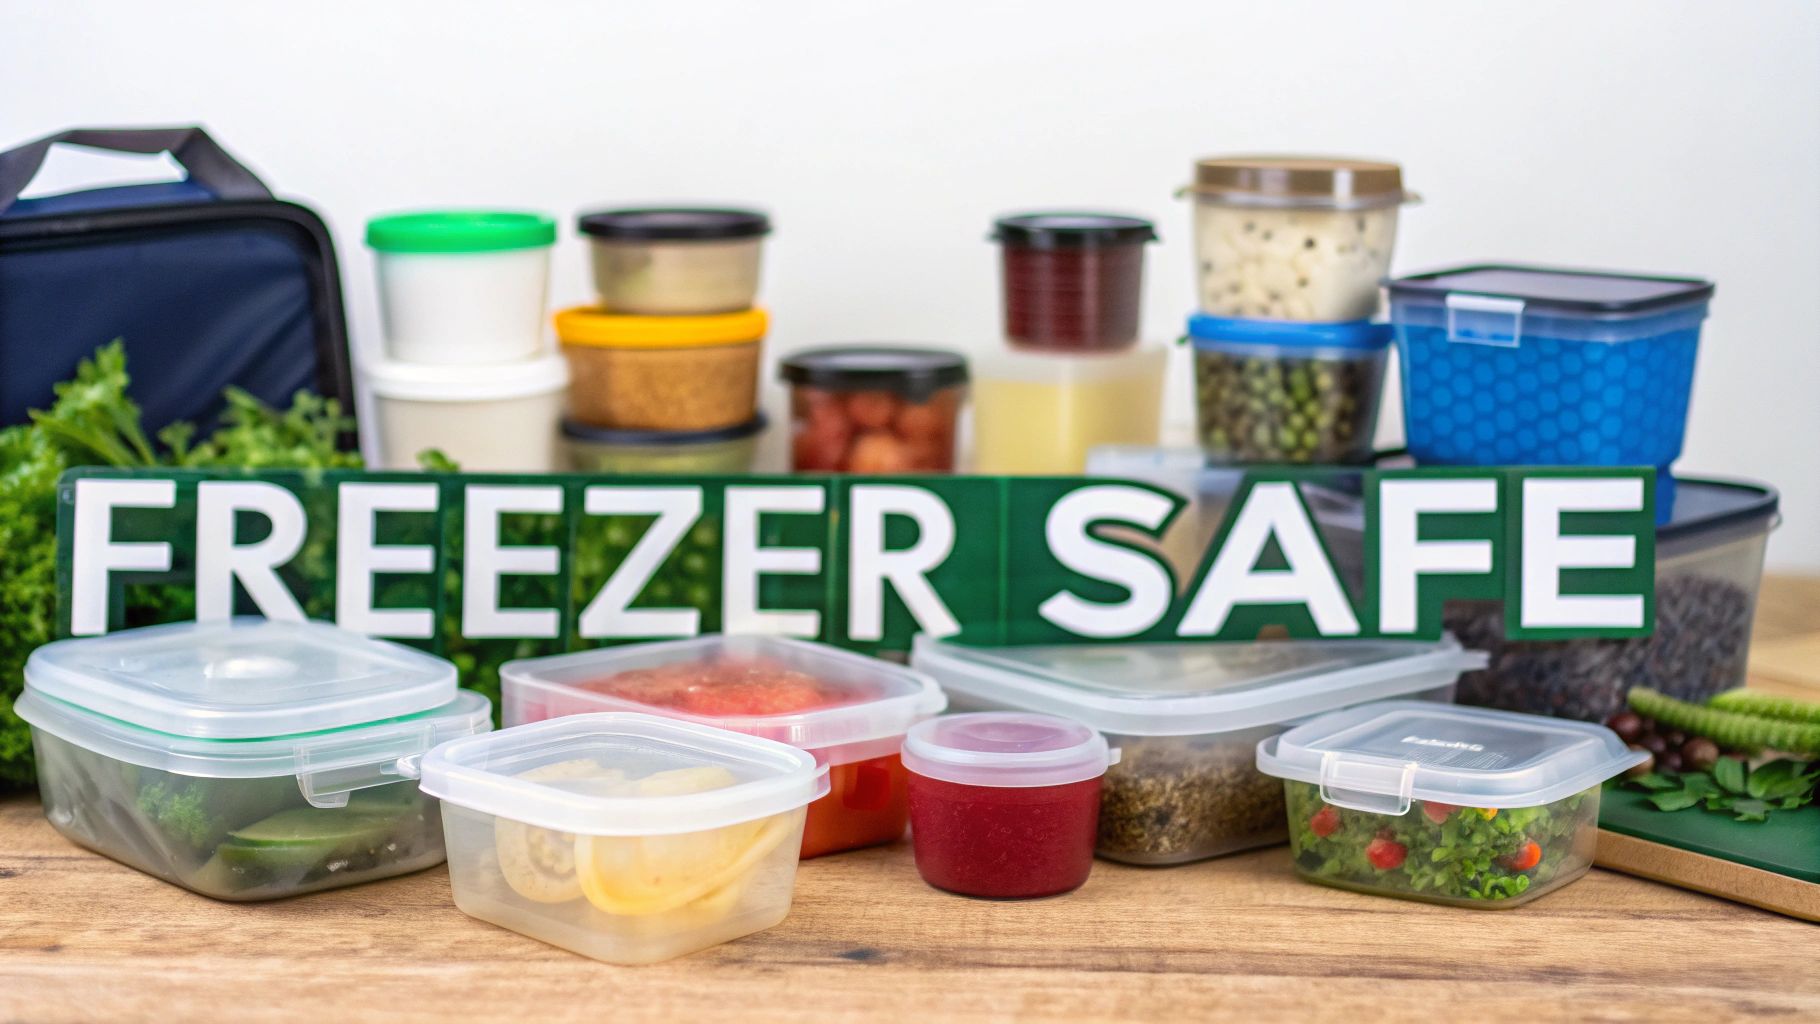
Let's be honest, nothing's worse than pulling a lovingly prepped meal out of the freezer only to find it's a cracked, icy mess. We've all been there. The secret to avoiding that culinary tragedy? Using the right containers.
The materials that can truly stand up to the deep freeze are borosilicate glass, food-grade silicone, and specific plastics—look for resin codes #2, #4, and #5. Choosing the right gear is the first step to making sure your freezer meals stay as delicious as the day you made them.
Your Guide to Freezer Safe Containers
Welcome to your freezer container boot camp! If you've ever dealt with the frustration of a container shattering or a meal ruined by those dreaded ice crystals, you're in the right place. Consider this your fast track to ending meal prep chaos for good.

Think of this guide as your cheat sheet to becoming a freezer organization pro. We're cutting through the noise and giving you the straight scoop on what containers are truly freezer-safe. We’ll pit trusty glass against versatile plastics and even the super-flexible silicone options. Getting a handle on the pros and cons of each is how you build a food storage system that actually works for you.
A Quick Look at Your Options
Before we get into the nitty-gritty, let's do a quick fly-by of the main players on the freezer-safe scene. Each one brings something different to the table, whether it’s rock-solid durability, flexibility, or pure convenience.
- Glass: The see-through superstar. It's fantastic for going from freezer to oven and never stains or holds onto that leftover chili smell.
- Plastic: The lightweight and budget-friendly champ. The trick is knowing which plastics are tough enough for the cold.
- Silicone: The flexible friend. Perfect for popping out single frozen portions and squeezing into tight spaces.
By the end of this guide, you’ll be able to confidently stock your freezer, turning that icy chaos into a treasure chest of delicious, ready-to-eat meals.
When you're putting in the work to plan meals with Meal Flow AI, you want them to stay fresh. We’re breaking it all down so you can match the perfect container to every soup, casserole, and sauce you prep. Let’s get started.
Cracking the Code on Plastic Containers
Ever feel like you need a secret decoder ring to figure out which plastic containers are safe for your freezer? You’re not alone. Walk down the kitchen aisle, and you're bombarded with options. The problem is, tossing the wrong kind of plastic in the freezer is a recipe for disaster—cracked containers, ruined food, and a big, icy mess.
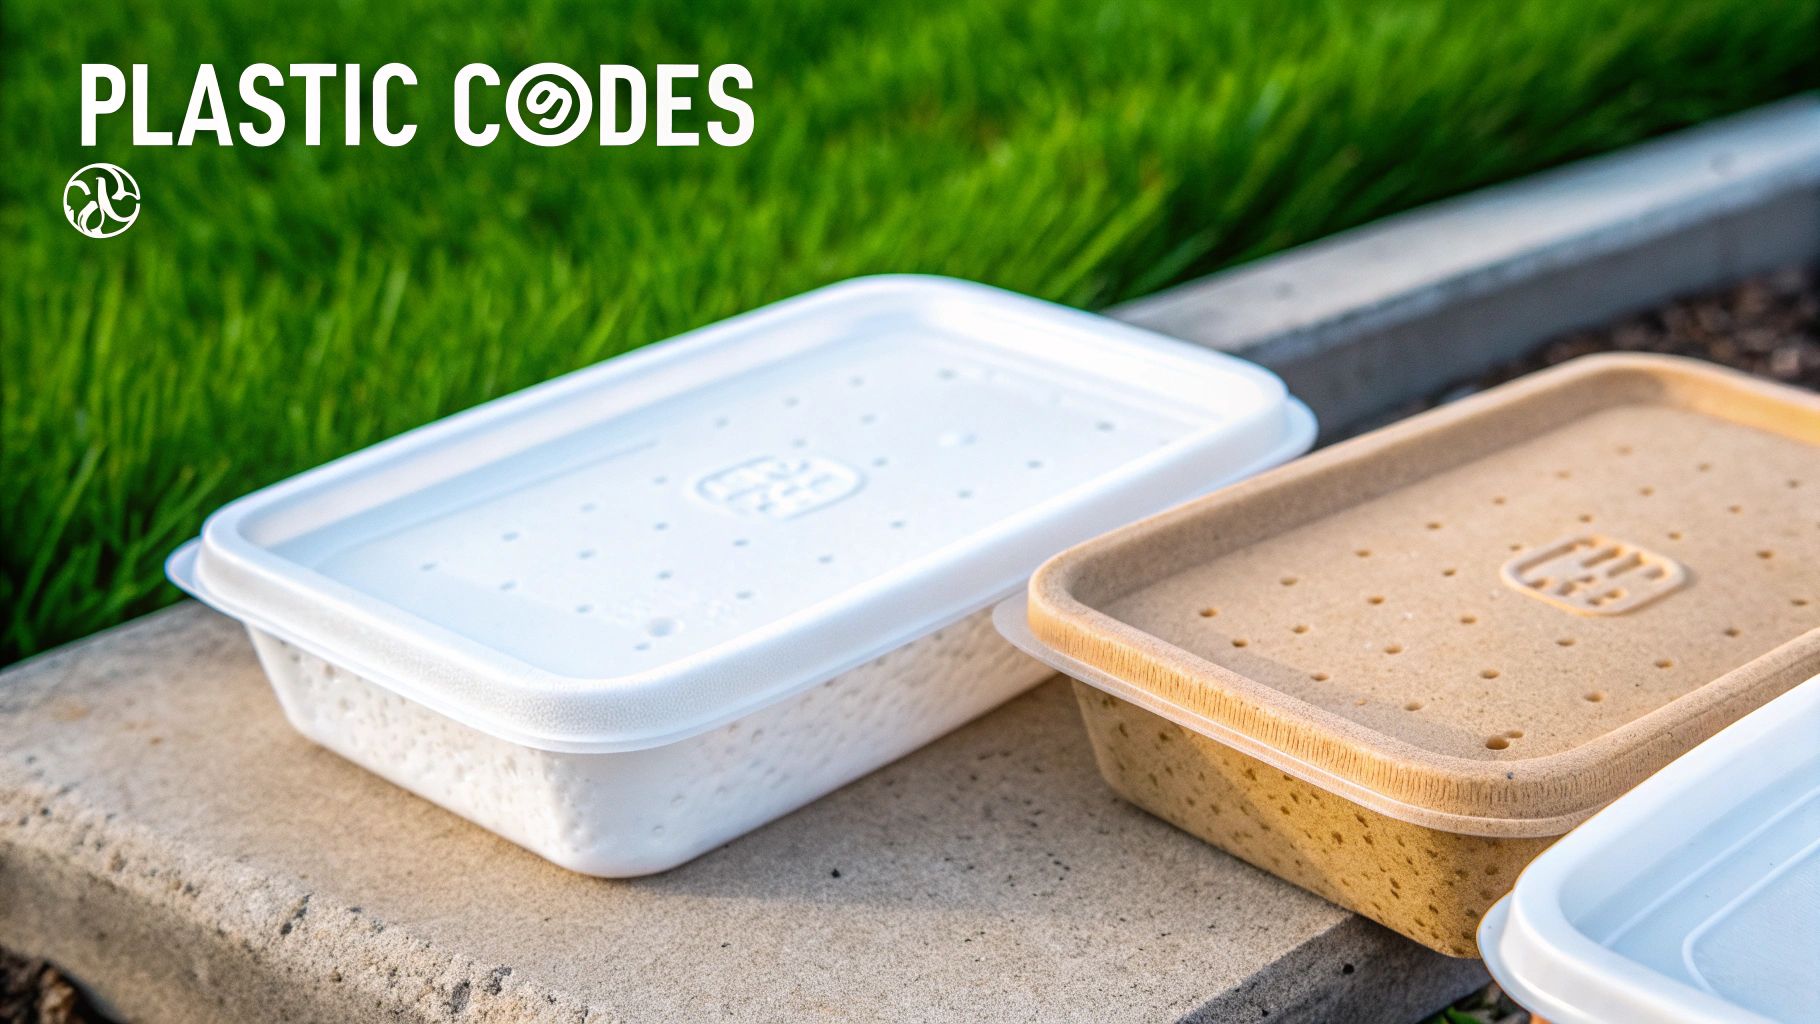
The secret is hiding in plain sight: that little number stamped inside the recycling symbol, usually on the bottom. This resin identification code is your cheat sheet, telling you exactly what the plastic is made of and whether it can handle a deep freeze. Let's break down the language of freezer-safe plastics.
The Freezer-Safe Champions
When you're stocking up, keep an eye out for three magic numbers: #2, #4, and #5. These guys are the all-stars of the freezer world. Their molecular structure is built to stay flexible and tough, even when the temperature drops well below freezing.
- #2 HDPE (High-Density Polyethylene): This is the tough, cloudy plastic you find in milk jugs or butter tubs. It's a workhorse—sturdy, resistant to moisture, and it won't get brittle and crack on you.
- #4 LDPE (Low-Density Polyethylene): Think of those zip-top freezer bags or the plastic wrap that actually clings. LDPE is all about flexibility, which is perfect for bags that need to wrap snugly around your food.
- #5 PP (Polypropylene): This is the meal prepper's best friend. It’s what most yogurt cups, cottage cheese tubs, and those clear takeout containers are made of. It’s strong, light, and often can go straight from the freezer to the microwave.
Learning these codes is the single best thing you can do for freezer food safety. It cuts through the marketing fluff and lets you choose containers based on real-world material science. Your food will thank you.
These plastics are your go-to because they can handle the expansion of freezing food without cracking under pressure. That makes them perfect for stashing away everything from hearty chilis and soups to leftover lasagna.
Looking Beyond the "BPA-Free" Sticker
We’ve all seen the "BPA-free" label plastered on everything these days, but here's a little secret: it doesn't automatically mean a container is freezer-safe. While avoiding BPA is a great practice for your health, focusing on the resin code is the most reliable way to guarantee both safety and durability in the freezer.
For anyone who meal preps, especially busy parents juggling weekly menus, knowing your plastics is a game-changer. Polyethylene (PE) and polypropylene (PP) containers, our trusty codes #2 and #5, are the gold standard. In fact, polyethylene can handle temperatures as low as -80°F (-62°C) without breaking a sweat.
But here’s a sobering fact: some studies suggest that up to 20% of plastic containers sold as BPA-free might still leach other unwanted chemicals, especially under temperature stress. This is why digging a little deeper and confirming the material is so important for health-conscious families.
If you’re using Meal Flow AI to plan your week, starting with a good set of HDPE (#2) or PP (#5) containers will make sure your delicious, prepped meals stay safe and taste just as good as the day you made them. And while plastic is incredibly convenient, it never hurts to explore your options. You can find many practical alternatives for plastic that work just as well, if not better, for certain foods.
Glass vs. Silicone: The Great Container Debate
Alright, now that we've cracked the plastic code, let's bring two other heavyweights into the ring: glass and silicone. This is the ultimate showdown—classic, sturdy reliability versus modern, mind-bending flexibility. Both are killer non-plastic options for stashing your meals, but they play the game in very different ways.
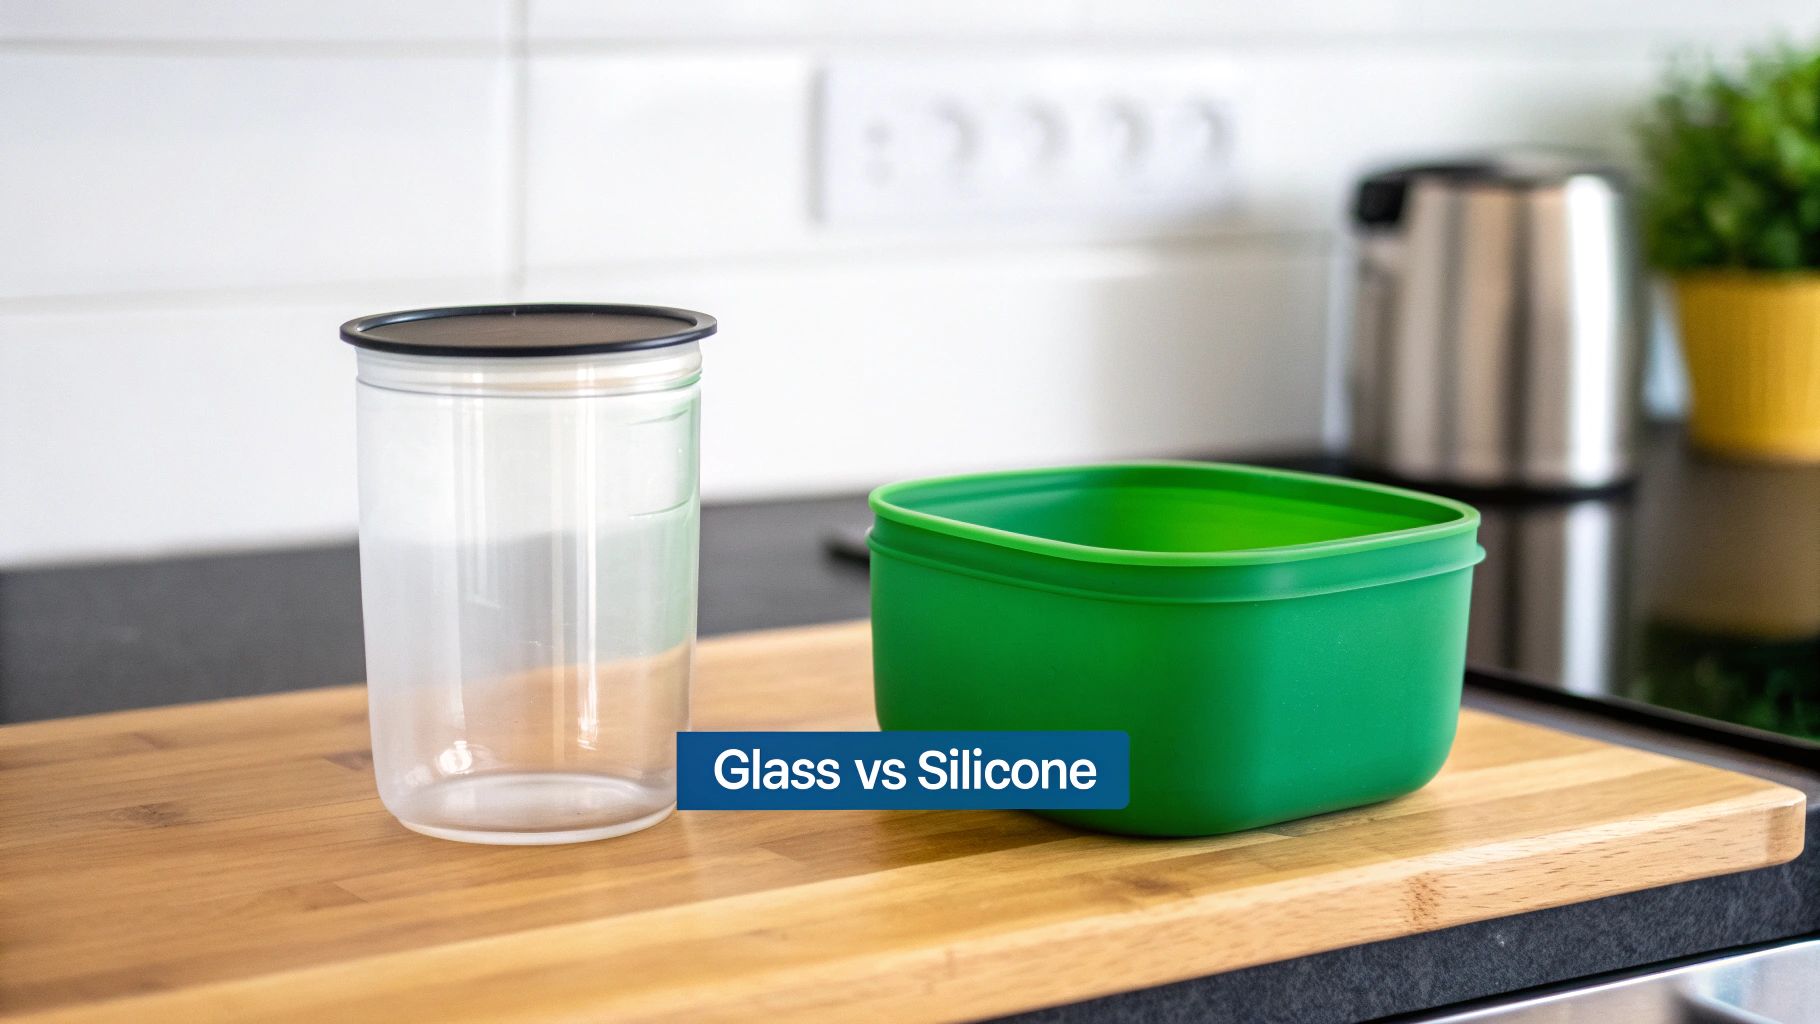
Honestly, picking a side isn't about which one is objectively "better." It's about what's better for you and the food you're freezing. Are you all about those bake-and-freeze casseroles? Or are you trying to create an army of perfectly portioned soup pucks? Your answer will lead you straight to your champion.
The Case for Glass Containers
Glass is the transparent titan of the kitchen. It’s completely non-porous, meaning it won’t get stained by tomato sauce or hold onto the ghost of last week’s curry. Plus, you can see exactly what’s inside, which means no more freezer roulette when you’re hunting for dinner.
The real magic of glass, though, is its incredible versatility. You can bake a lasagna, freeze it, and then reheat it in the oven or microwave, all in the same dish. That’s a massive win for convenience and a huge cut in your dishwashing duties.
But glass does have an Achilles' heel: thermal shock. This is what happens when glass goes through a sudden, dramatic temperature swing—like from a frosty freezer straight into a scorching oven. The rapid expansion can cause it to crack or, in a worst-case scenario, shatter spectacularly.
To sidestep this kitchen nightmare, always look for borosilicate glass, which is engineered to handle temperature changes much better. Even with borosilicate, the safest bet is to let your container thaw in the fridge for a bit before you heat it up.
Pro Tip: Always leave about an inch of headspace when freezing liquids in glass. Water expands by about 9% when it freezes, and that extra room gives it space to grow without putting pressure on the container walls. No cracked glass, no ruined soup.
The Silicone Solution
Silicone is the fun, flexible newcomer to the freezer scene. This food-grade material is ridiculously durable, naturally non-stick, and super lightweight. Its true superpower is its pliability, which has made it a darling of the modern meal-prep world for a few very good reasons.
- Portioning Perfection: Silicone trays—think giant ice cube molds—are a game-changer for freezing single-serving "pucks" of soup, broth, or even baby food. Once they're frozen solid, you can pop them out and toss them into a bigger freezer bag, freeing up your tray for the next batch.
- Space-Saving Genius: Many silicone containers are collapsible, a total lifesaver if your cabinet space is limited. They’re also champs at squeezing into those weird, awkward corners of a jam-packed freezer.
- Built to Last: You never, ever have to worry about silicone shattering if you drop it. It can bounce back from extreme temperatures, hot or cold, without breaking a sweat.
Silicone's flexibility makes it a fantastic sidekick for your Meal Flow AI plan, especially when you're batch-prepping sauces and stocks. The only real knock against it is that it can sometimes absorb strong odors, but a good scrub usually fixes that right up.
Material Showdown: Plastic vs. Glass vs. Silicone
So, how do these materials really stack up against each other for the everyday meal prepper? Let's break it down feature by feature. This handy table cuts through the noise and shows you where each material wins and where it falls short.
| Feature | Plastic (HDPE/PP) | Glass (Borosilicate) | Silicone |
| Cost | Inexpensive. The most budget-friendly option for buying in bulk. | Mid-to-High. A bigger upfront investment, but lasts for years. | Mid-Range. More expensive than plastic, often cheaper than quality glass. |
| Durability | Good. Can warp or stain over time. Prone to cracking if dropped when frozen. | Excellent, but brittle. Can last a lifetime if not dropped or thermally shocked. | Nearly Indestructible. Doesn't shatter, crack, or warp from temperature changes. |
| Weight | Very light. Easy to carry and stack. | Heavy. Can be cumbersome, especially when filled. | Lightweight & Flexible. Easy to handle and store. |
| Versatility | Good. Microwave-safe (check the label!), but not for oven use. | Excellent. Oven, microwave, freezer, and dishwasher safe. The ultimate all-in-one. | Very Good. Microwave, freezer, and dishwasher safe. Some are even oven-safe. |
| Staining/Odors | Prone to staining (especially from tomato sauces) and can hold onto odors. | Resistant. Non-porous surface doesn't stain or absorb odors. | Mostly resistant, but can sometimes hold onto strong smells like garlic or onion. |
| Storage | Good. Most types are stackable. | Fair. Can be bulky and difficult to nest, taking up more cabinet space. | Excellent. Collapsible and flexible designs save a ton of storage space. |
At the end of the day, having a mix of both glass and silicone in your kitchen arsenal means you'll always have the perfect tool for whatever freezing task comes your way.
Mastering the Art of Freezing Food
Knowing which containers won't shatter in the cold is half the battle. But your technique is what separates a freezer full of delicious, ready-to-go meals from a graveyard of icy, freezer-burnt disappointments. Think of it this way: choosing the right container is like picking the right car for a road trip, but how you pack and drive determines if you actually get there in one piece.
Your freezer is basically a time capsule for your cooking. The mission? To lock in every bit of flavor and texture, so the meal you pull out next month tastes just as good as the day you made it. It all boils down to a few simple habits that make a world of difference.
The Three Golden Rules of Freezing
These aren't just suggestions; they're the non-negotiable laws of the freezerverse. Get these right, and you'll sidestep all the classic blunders like cracked containers and weird ice crystals.
- Cool It Down: Never, and I mean never, put hot food straight into the freezer. It’s like throwing a hot coal into an igloo. The freezer's temperature spikes, which can partially thaw everything around it and create a field day for bacteria. Always let your food cool to at least room temperature first.
- Leave Headspace: Remember that science experiment from middle school? Liquids expand when they freeze. For anything soupy, saucy, or stew-like, leave about an inch of empty space at the top. This gives your food room to stretch out without popping the lid off or, worse, cracking your favorite glass container.
- Get an Airtight Seal: Air is the ultimate villain in your freezer. It’s the culprit behind freezer burn, which is just a fancy term for dehydrated, sad-tasting food. A rock-solid, airtight seal is your meal's personal bodyguard. Snap those lids on tight!
Freezer burn isn’t some mysterious monster lurking behind the ice trays. It's just what happens when air gets to your food and sucks all the moisture out. A great seal is the only shield you need.
Pro-Level Freezing Techniques
Okay, ready to level up? These are the little tricks that transform you from a freezer amateur into a meal-prep pro. This is how you make your freezer work for you.
When you're serious about meal planning, the containers you choose impact everything from food safety to how neatly your freezer stacks. The safest plastics for the job are those with resin ID codes 2 (HDPE), 4 (LDPE), and 5 (PP). You'll also find that rigid containers with straight sides are a dream—they release frozen food easily and stack like perfect little bricks. If you're using a service like Meal Flow AI, it's good to know that experts recommend keeping containers to a half-gallon or less for produce, as bigger batches freeze too slowly in the middle.
One of the best habits you can ever build is portioning before you freeze. Think single servings. It makes grabbing a quick lunch or a last-minute dinner ridiculously easy. You just thaw what you need, which means less waste and a much simpler life.
Another absolute game-changer is flash-freezing. Spread things like meatballs, berries, or chunks of cookie dough out on a baking sheet in a single layer. Freeze them solid, then toss them all into a freezer bag. This brilliant little step keeps them from fusing into one giant, impenetrable ice-boulder. In fact, learning about specialized tools for making ice cream can actually teach you a lot about ideal temperatures and techniques for perfect freezing.
And for the love of all that is delicious, label everything! A permanent marker is your best friend here. Scribble down what it is and the date you froze it. This tiny two-second task saves you from the mystery-meal-roulette later on and helps you use up older food first. Want more tips like these? Check out our full guide on how to store prepped meals. Trust me, your future self will be very grateful.
How to Choose the Perfect Container for Your Meal
Alright, you've conquered the kitchen. Your Meal Flow AI plan is a masterpiece, the house smells incredible, and now it's time to fill the freezer. But wait... which container do you grab? This is where the rubber meets the road—picking the right vessel for your food is key to locking in freshness and making your life easier later.
Think of it like a quick little matching game. A big batch of chili has different needs than a single-serving lasagna. Getting this right is the secret handshake of pro meal preppers. It means no cracked glass, no freezer-burned chicken, and a happy, well-fed you on a frantic Tuesday night.
Your Quick Decision Guide
Let’s cut through the noise. Here's a simple thought process to help you choose the perfect home for your delicious creations, keeping them safe, sound, and scrumptious.
- For big-batch soups, chilis, or stews: Grab a large, deep glass container or a trusty BPA-free plastic tub (look for the #5 PP symbol). These guys are champs because they give liquids plenty of room to expand and can handle the weight of a hearty meal.
- For individual casserole or lasagna portions: Small, oven-safe glass containers are your best friend here. This is the ultimate "freezer-to-oven" power move. Seriously, it saves you from washing an extra dish and shaves precious minutes off your reheating time.
- For smoothie packs or chopped veggies: You can't beat flexible silicone bags or the classic zip-top freezer bags (#4 LDPE). The trick is to squeeze out every last bit of air before you seal them up. This is your best defense against freezer burn, and they stack beautifully.
- For sauces, broths, or baby food: A silicone tray is an absolute game-changer. Freeze your liquids into perfect little pucks, then pop them out and toss them into a bigger freezer bag. This frees up your valuable trays so you can keep the freezing train rolling. For more genius storage hacks, check out our guide to the best meal prep containers with lids.
This simple flowchart lays it all out, helping you nail the perfect freeze every single time.
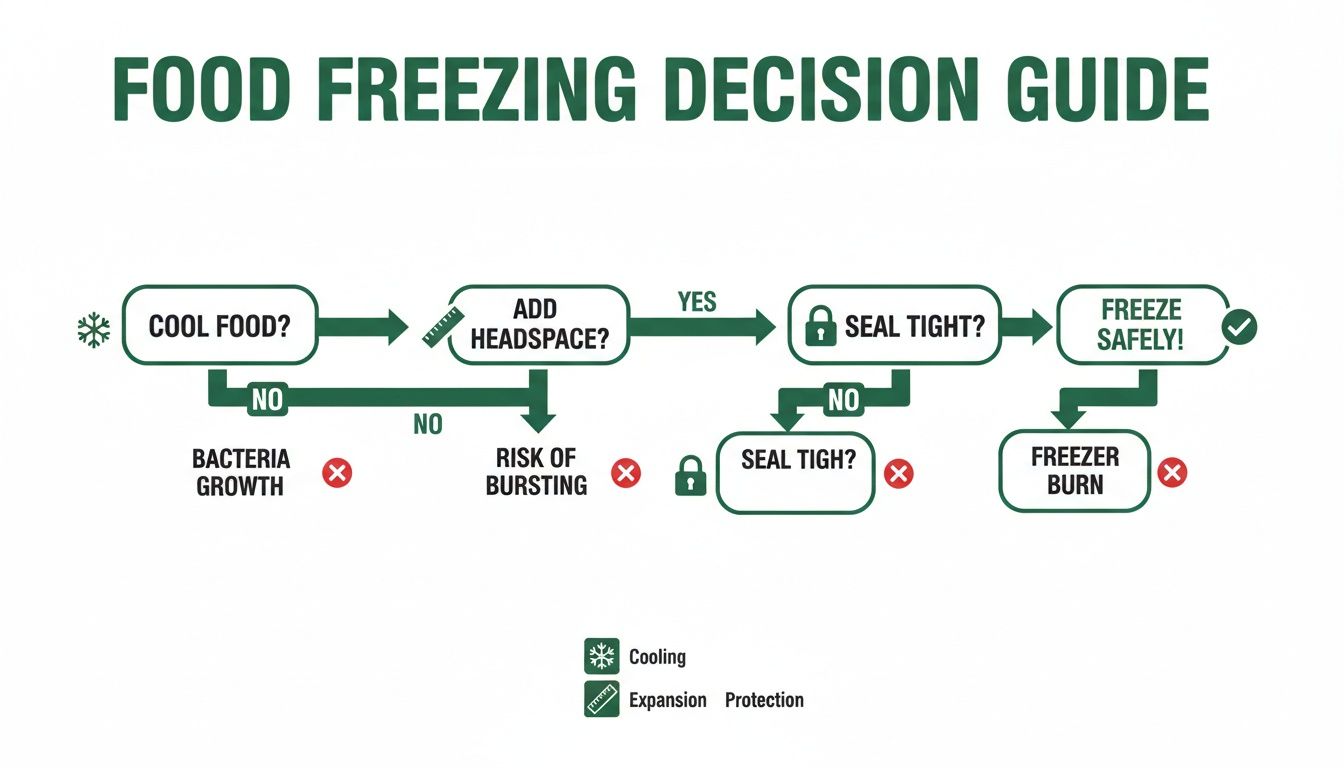
It all comes back to the golden rules: cool your food completely, leave a little headspace for things to expand, and get that lid on tight to keep the air out.
Let's Bust Some Common Freezer Myths
Your freezer is a meal-prepper's best friend, but it's also the subject of a ton of kitchen folklore. Is that icy chicken breast a goner? Did you commit a cardinal sin by refreezing those pork chops? Let's clear the air and bust a few of these persistent myths.
One of the biggest culprits is the rumor mill around plastic containers. People often get nervous about freezing food in plastic, but that worry is usually misplaced. In reality, the cold, stable environment of a freezer is a surprisingly low-risk situation. Freezing actually slows down the molecules in both the food and the plastic, making it incredibly unlikely that anything unwanted will leach into your meals. You can read more about the science behind plastic safety if you want to geek out on the details.
What's the Real Deal with Freezer Burn and Refreezing?
Let's tackle freezer burn. We've all seen it—those grayish-brown, leathery patches on our frozen foods. It looks pretty unappetizing, but is it actually dangerous? Not at all.
Freezer burn is just dehydration. It’s what happens when air gets to your food and wicks away all the moisture, kind of like a culinary windburn. While it can make your steak a bit tough or your veggies a little spongy, the food is still 100% safe to eat. To become a pro at avoiding it, check out our complete guide on how to prevent freezer burn.
Myth: You can never, ever refreeze thawed food.
Fact: You absolutely can, as long as you follow one simple rule. If the food was thawed safely in the refrigerator (and not left out on the counter), it's perfectly fine to refreeze it without cooking it first. You might lose a little bit in the texture department, but it’s completely safe.
That brings us to another huge misconception: that thawing is a point of no return. Life happens! If you thawed some ground beef in the fridge for tacos but then decided to order a pizza, you can absolutely toss that beef right back into the freezer for another day. No harm, no foul.
Once you know what's fact and what's kitchen fiction, you can wield your freezer's power with total confidence. You'll cut down on waste, save some cash, and feel great about the delicious meals you've got waiting in the wings.
Your Burning Freezer Container Questions, Answered
Alright, even the most seasoned meal prepper runs into a head-scratcher now and then. We get a ton of questions, so I've rounded up the most common ones to help you tackle those little "what if" moments in the kitchen.
Can I Just Shove Hot Food Straight Into a Freezer Container?
Whoa there, slow down! I know it’s tempting to get that hot chili off the counter and into the freezer ASAP, but this is a major no-no.
Putting a steaming-hot container in your freezer does two bad things. First, it acts like a little space heater, warming up everything around it and potentially partially thawing your other frozen goods. Second, the food cools down way too slowly, creating the perfect warm, cozy environment for nasty bacteria to throw a party. We don't want that.
Always, always let your food cool down to at least room temperature before you pop on the lid and freeze it. It’s a simple step that makes all the difference for food safety.
What’s the Secret to Keeping These Containers Clean?
A little TLC goes a long way in making your containers last. For glass and silicone, a trip through the dishwasher usually does the trick. Plastic, on the other hand... well, it likes to hang onto memories of past meals, like that stubborn spaghetti sauce stain or the lingering ghost of garlic.
Pro-Tip: To exorcise those pesky stains and smells from your plastic containers, make a paste with baking soda and a little water. Slather it inside, let it sit for a few hours, then wash it like normal. It works like magic!
Whatever you do, steer clear of abrasive scrubbers on any container. They create tiny scratches that are perfect hiding spots for bacteria. Gentle cleaning is the name of the game.
How Can I Tell if a Container Is Actually Freezer-Safe?
When in doubt, don't risk it. If you're staring at a container and can't find that little snowflake symbol or a clear plastic resin code like #2, #4, or #5, it's best to find another option.
Tossing the wrong type of container into the deep freeze can cause it to crack and shatter. Not only does this ruin your perfectly good meal, but it can also leave behind nasty little shards of plastic in your food. It’s just not worth the gamble. Stick with the containers you know are built for the cold.
---
Ready to make your meal planning effortless? Meal Flow AI generates personalized meal plans and shopping lists, sending them straight to Instacart. Take the guesswork out of dinner and get started today.